
Essential Beginner Volleyball Drills to Build Skills and Keep Kids Engaged
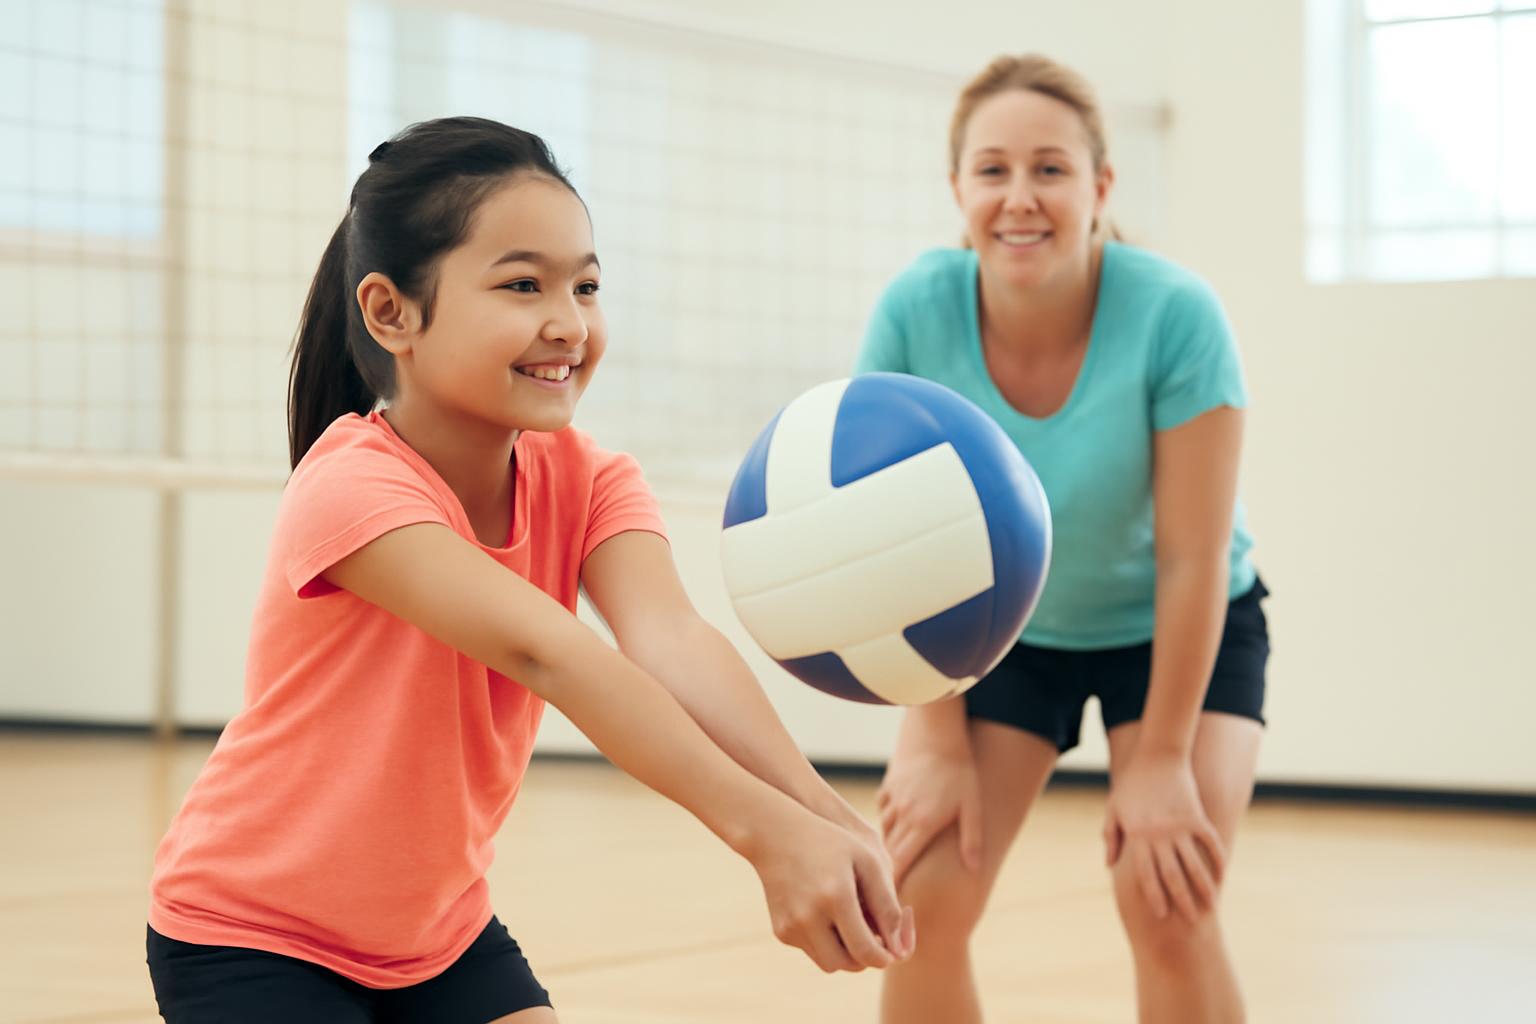
Partner tosses, self-toss work and small-sided play teach the first contacts beginners need in almost every rally, without starting in 6-on-6.
If your child is curious about volleyball, you do not need a full team, a tournament calendar, or a club commitment to find out whether the sport fits. A ball, a little space, and a short list of beginner-friendly drills can reveal a lot very quickly.
That early test matters for parents. Before you commit to a season, it helps to see how your child responds to the actual building blocks of the game: moving to the ball, making simple contact, trying again after a miss, and enjoying basic rally play. That also fits Youth Listings’ parent-first approach to comparing schedules, fees, and program structure.
The goal here is not to rush a brand-new player into advanced technique. It is to build early comfort with passing, setting, serving, and simple attacks, then move toward short, game-like play that feels fun instead of overly technical. That gives parents and coaches something useful to watch: not only whether a child can do the drill, but whether they want another rep.
Why Start with Beginner Drills Before Joining a Youth Program
Beginner drills give kids a lower-pressure way to sample volleyball before a full season starts. A good first session usually strips the game down without removing the parts that make it recognizable. Instead of throwing a new player into 6-on-6 right away, you can use partner tosses, self-toss work, and small-sided play to teach the first contacts they will need in almost every rally. Coaching Volleyball’s beginner framework makes that case directly: stay as close to game context as possible, but simplify it, and use blocked repetitions to teach before adding variation for longer-term learning (Coaching Volleyball).
For families, that progression is practical.
It also helps you evaluate fit before you evaluate programs. Some kids like repetition right away. Some need every activity to feel like a game. Some can miss a dozen serves and stay cheerful; others get frustrated much faster and may do better in a recreational setting with lighter expectations. Those differences matter because they tell you what kind of program environment is more likely to work.
What parents should watch is simple: Does your child move toward the ball on their own? Do they reset after a mistake without melting down? Do they ask to keep going? A beginner drill session is not a tryout. It is a low-stakes preview of how the sport feels to that child.
Warm-Up Drills to Build Movement and Ball Control
A beginner warm-up should do three things quickly: get kids moving, get them touching the ball, and give them an early success.
One useful way to open is with volleyball-shaped movement rather than generic jogging. A simple circuit can include shuffles, blocking-style hand work, basic approach footwork, and easy throws with a partner.
If attention starts to drift, quick reset drills help. The Art of Coaching Volleyball includes an Energy Check drill where players hold a volleyball between their knees, clap a rhythm, and shout “volleyball,” along with beginner activities such as Down Ball Hitting, Toss Up Setting, and Low Catch Passing to introduce hand position, overhead ball location, and low-body posture in a playful way (The Art of Coaching Volleyball).
A beginner version can look like this:
- Shuffles: Start in an athletic stance and move a few steps right, then left.
- Blocking movements: Raise both hands and rehearse small, balanced movements toward a net line or imaginary net.
- Approach footwork: Practice the steps of a simple hitting approach without worrying about jumping high.
- Partner throws: Finish with light throws back and forth to wake up tracking and timing.
- Energy reset if needed: Drop in a quick, silly drill before attention disappears.
- Down Ball Hitting: Hold the ball in front of the hitting shoulder and strike it down to the floor with the full hand.
- Toss Up Setting: Toss above the head and catch with fingers spread.
- Low Catch Passing: Toss high, let the ball bounce once, then get low and catch before the second bounce.
If you have a few players and a net or rope, Team Pepper with Rotating is a strong bridge from warm-up into the rest of practice. Gold Medal Squared lists it as a beginner-friendly warm-up and ball-handling drill, and the rotating format helps avoid stagnant lines (Gold Medal Squared).
A simple version is enough:
- Put a small group on each side.
- Start a cooperative pass-set-send pattern.
- Rotate players after the ball goes over.
- Keep it cooperative before making it competitive.
For parents watching from the side, a good warm-up is a clue about the whole program. If kids are moving, touching the ball often, and smiling early, the practice is usually organized around engagement rather than waiting.
Passing Drills: The Foundation for Every Rally
Passing is usually the first skill to prioritize because it makes everything else possible. Once a beginner can control the first contact with a stable forearm platform, rallies start to resemble volleyball instead of a scramble.
A simple first step is Partner Toss and Pass. One youth guide suggests starting partners roughly 10 to 15 feet apart, with one player tossing underhand and the other returning the ball on the forearms using a controlled platform (Triple F Sports).
Start with a structure that makes success likely:
- Keep partners close enough that the ball can be read easily.
- Use high, gentle tosses at first.
- Ask the passer to make the platform early instead of swinging late.
- Return the ball to the tosser or toward a marked target.
- Add movement only after the basic exchange settles down.
That same idea becomes Toss to Pass when the tosser begins changing location slightly: a little left, a little right, a little shorter, a little deeper. Once the player can adjust with their feet instead of reaching wildly with the arms, you can turn the same drill into a purpose-based version often called Toss-Pass-Target Triangle. Instead of just sending the ball back, the passer angles it toward a waiting target. That teaches an important beginner concept: a pass is supposed to help the next player.
If posture is the bigger problem, use Low Catch Passing before clean forearm passing. Toss the ball high, let it bounce once, and have the player get low enough to catch it just before the second bounce. That is especially helpful for kids who keep standing too tall.
A few passing cues do most of the work:
- move feet before arms;
- keep shoulders level;
- straighten the arms into one platform;
- angle the platform toward the target;
- stay low enough to move, not frozen upright.
For parents, passing drills are also revealing. A child who enjoys chasing a better angle or trying to beat their last clean rep may be ready for more structure. A child who shuts down after every bad touch may need shorter rounds, easier tosses, or more game-style practice.
Setting Drills: Overhead Control for Beginners
Setting often feels harder to beginners because overhead contact is less natural than a forearm pass. But the first stage of setting is not running a sophisticated offense. It is learning to get under the ball, shape the hands correctly, and push the ball upward with control.
A very approachable version is Partner Setting. A youth drill guide recommends partners stand close enough for a comfortable exchange and focus on a diamond-shaped hand position above the forehead while sending high, controlled balls back and forth (Triple F Sports).
Teach it in layers:
- Freeze the hand shape before the ball arrives.
- Start with a high toss, not a fast exchange.
- Ask for soft contact instead of force.
- Keep the ball high enough that the partner can reset under it.
- Move farther apart only when both players can repeat the contact.
Before partner work, many beginners benefit from self-toss drills. Toss Up Setting is a good first step: toss above the head and catch with fingers spread. From there, move to Self-Toss to Set by tossing the ball up and setting it to yourself once or twice. The point is not speed. The point is learning where the ball should be and moving the feet under it instead of leaning backward or swatting from the side.
A useful next progression is a Setting Triangle: one player tosses, one player sets, and one player serves as the target. The target can even catch the ball. That gives the set a destination without needing a full hitter behind it.
A few cues help more than a long lecture:
- get under the ball early;
- use finger pads, not palms;
- keep the ball in front of the face;
- use the legs to lift the ball;
- finish toward the target.
For parents practicing at home, the biggest mistake is making setting too advanced too soon. If your child can toss, settle, and send a reasonably straight ball upward several times in a row, that is real beginner progress.
Serving Drills from Short Distances
Serving is exciting for new players because it feels independent. The player controls the start of the rally. It can also become discouraging fast if you begin from full distance and every ball dies early.
A more useful progression is to start close, build repeatable contact, and move back only when success becomes consistent. The Art of Coaching Volleyball demonstrates a Deliver and Pop Serve progression that breaks the skill into smaller parts: deliver the ball to a reachable height, then use controlled contact rather than an all-out swing (The Art of Coaching Volleyball).
A beginner sequence can be simple:
- Hold the ball still out in front.
- Practice the toss or delivery without swinging.
- Start with an underhand serve if overhead contact is not ready yet.
- Serve from well inside the court.
- Move back only after several clean contacts in a row.
Teach a pendulum-style swing and a step with the opposite foot. The goal is not power. It is contact out in front of the body and a ball that travels to a chosen area on purpose.
Once the player can serve from a shortened distance, accuracy games become more useful than repeated misses from the end line. A recreation drill guide includes Around the World, where players or teams serve toward zones 1 through 6 and try to complete the court before the other side does (Beginner Volleyball Drills PDF).
You can simplify it even more by using only three zones, letting players throw to a target first, or moving them closer for deep areas.
When serving breaks down, the fix is usually small:
- if the toss is wild, rehearse only the toss;
- if the ball goes sideways, check whether contact is drifting across the body;
- if the ball dies early, shorten the court again;
- if frustration climbs, turn the drill into a target game.
Parents can learn a lot here too. Some kids love the independence of serving practice. Others need the social feedback of partner drills and lose interest quickly when every rep starts alone.
Hitting Drills: Start Simple Before Full Approaches
Hitting should usually come after a beginner can already pass, set, and send the ball with some control. For true beginners, the easiest entry point is not a dramatic jump swing. It is learning the arm path, making balanced contact, and sending the ball where intended.
A straightforward progression is Down Ball Hitting, then Self-Toss Hitting, then Hitting from a Set or Toss. One beginner drill guide recommends starting with standing attacks and self-toss work before layering in more approach complexity (Triple F Sports).
That sequence keeps the skill understandable:
- Down Ball Hitting: Strike the ball down to the floor with the full hand.
- Self-Toss Hitting: Toss the ball to yourself and send a controlled standing attack over the net or into open space.
- Hitting from a Toss or Set: Let a partner or coach provide an easy ball so the hitter can focus on timing.
- Approach later: Add approach steps only after the player can stay balanced through contact.
For many beginners, a standing attack is the right first attack. If the toss is inconsistent and the feet are rushed, the player ends up learning how to chase bad balls instead of how to hit well.
A wall can help too. Wall Balls are often used for repeated arm-swing work, but for beginners the wall is most useful as a control tool rather than a power test:
- stand far enough away to react comfortably;
- use a full hand, not a slap;
- keep the swing compact at first;
- look for repeated, square contact.
The parent takeaway here is simple. Hitting is fun, but it is also the place where many beginners start forcing the game. If your child loves the arm swing but loses all control once steps and timing are added, stay with standing reps longer. That is not falling behind. It is matching the drill to the player.
Fun Game-Like Drills for Engagement
As soon as beginners can pass a tossed ball, set or free-ball it upward, and send it over from a short court, they should start playing simplified games. This is often the point where a child decides whether volleyball feels enjoyable enough to keep pursuing.
A strong first option is a 2v2 Mini-Game on a reduced court. The main idea is simple: pass the ball up, then send it over. Doubles gives beginners more touches, fewer decisions than full-team play, and clearer responsibility on each contact.
You can run it a few different ways:
- make the first goal purely cooperative;
- allow a catch on first contact for the newest players;
- require players to call the ball;
- keep the court short enough that rallies can actually happen.
Gold Medal Squared groups drills such as Shortcourt, Speedball, and King or Queen of the Court as beginner-friendly gamelike activities, which is one reason they work so well in youth sessions: they create more touches and more decisions than standing in lines (Gold Medal Squared).
Three good choices are:
1. 2v2 Mini-Game
- Use a reduced court.
- Start with toss-ins instead of tough serves.
- Ask for a pass up before the ball goes over.
- Add scoring only after the rally shape makes sense.
2. Queen of the Court
- Keep one side as the “queen” side.
- Send challengers in for one short rally.
- Let winners stay or rotate up, depending on the version you want.
3. Shortcourt or Speedball
- Shrink the playable space.
- Reward ball control and cooperation.
- Keep rounds short so attention stays high.
For pure serving fun, many youth coaches also use Dead Fish, a team serving game where players who miss move to the other side and try to get back in later.
The caution with game-like drills is not skill level so much as rule overload. Pepper, Queen formats, and rotation games can become confusing if you add too much too soon. Start with one objective:
- call the ball;
- pass up, then over;
- serve into the court;
- keep the rally alive for three contacts if possible.
For parents, this section may be the most informative of all. If a child lights up once the drill becomes a game, that usually tells you something important about what kind of coach or program style will hold their attention.
Solo Drills for Home Practice
Solo drills are not a replacement for partner play, but they are excellent for touch, coordination, and confidence. They are especially useful when a child is still deciding whether to join a team, because they remove the logistics problem of needing a full gym or a group practice.
US Sports Camps suggests several simple at-home drills, including passing to yourself, vertical sets while lying on your back, standing self-setting, and a lateral hop and hold footwork drill (US Sports Camps).
A short home menu can look like this:
Passing to self
- Start in a passing stance.
- Pass the ball straight up.
- Try to keep your feet quiet at first.
- Then add a step forward, back, or side to side between contacts.
Vertical sets on your back
- Lie on your back with knees bent.
- Hold the hands above the face in setting position.
- Set the ball straight up and repeat.
Standing self-sets
- Stand and set to yourself repeatedly.
- Reposition your feet under the ball each time.
- Focus on height and straightness, not speed.
Wall bumps or wall sets
- Use a safe wall and enough space.
- Pass or set to the same spot repeatedly.
- Try to keep a steady rhythm.
Lateral hop footwork
- Start in an athletic stance.
- Hop laterally and stick the landing.
- Hold balance before the next rep.
Home practice is also a useful filter for parents. If your child voluntarily self-sets in the yard for ten minutes, that is a strong sign of interest. If they only enjoy volleyball when friends are involved, that is useful too. Either answer helps you choose the right next step.
Sample 60-Minute Beginner Practice Structure
If you have about an hour, a beginner session does not need to be complicated. It works best as a practical framework, not a rigid script.
Think in four short blocks rather than one long technical segment:
- Warm up with movement and easy ball touches.
- Spend the biggest block on passing and setting.
- Use a shorter middle block for serving and simple hitting.
- Finish with a game-like activity.
That order makes sense for beginners because it starts with control, adds complexity gradually, and ends with something that feels like volleyball rather than isolated reps.
A practical version might look like this:
- open with shuffles, approach footwork, partner throws, or a quick energy reset;
- move into toss-and-pass, low catch passing, self-toss setting, and partner setting;
- shift to short-distance serving and standing attacks from a toss;
- close with 2v2, shortcourt, Queen of the Court, or a serving game.
The important part is not the exact minute count. It is the progression. Beginners usually do better when practice moves from predictable reps to slightly more variable tasks and then into simplified play. Parents watching a program can use the same lens: lots of touches, short lines, simple cues, and at least some game-like work by the end of the session.
What equipment do beginners need for these drills?
Not much. For most of the drills in this guide, a beginner can start with:
- one volleyball;
- a safe open space;
- a wall for solo practice;
- a partner for toss-and-pass or setting exchanges;
- cones, tape, or even shoes to mark targets;
- a net, rope, or imaginary line for over-the-net games.
If you are only testing interest, start with the minimum. A child can learn passing posture, self-setting, footwork, and short-distance serving without a full court.
How to adapt drills for kids under 10?
The beginner sources here do not offer one standardized under-10 template, so it is better to treat adaptations as practical coaching choices rather than fixed rules.
That usually means: - shorter distances; - lighter tosses; - fewer contacts required before success; - more catch-and-release versions before full exchanges; - faster rotation so nobody waits long.
A pass can become toss-catch-free-ball. A rally can become pass-up-then-over on a very short court. The goal is still the same: enough successful contacts that the child wants the next turn.
What are common beginner mistakes in passing and serving?
Common beginner mistakes usually start with posture and footwork rather than hand skill. In passing, beginners often stand too tall, reach with the arms instead of moving the feet, or swing at the ball instead of holding a stable platform. In serving, they often begin from too far back, toss the ball inconsistently, or try to hit hard before they can control direction.
Useful corrections are usually short:
- move your feet first;
- freeze the platform;
- make the toss repeatable;
- start closer;
- aim before you swing.
Those common errors align with the coaching issues highlighted in a beginner drill guide that notes footwork, communication, stance, warm-up habits, and focus as frequent problems in youth volleyball practice (Valley Athletics).
Where to find more free lesson plans?
USA Volleyball offers free lesson-plan materials for teachers and coaches, including grade-banded plans built around hitting, overhead passing or setting, serving, forearm passing, and blocking. The page also emphasizes gamelike drills, using a net or rope when possible, and favoring more random, whole-skill practice instead of living in blocked work for too long (USA Volleyball lesson plans).
If you want more structure, start there. It is especially helpful for parents assisting at home, PE teachers, or new coaches who want a sequence rather than a random list of social-media clips.
How do indoor and beach volleyball drills differ for beginners?
The biggest beginner differences are the environment and the player count. One beginner guide notes that indoor and beach volleyball differ in ball type, footwear and surface, and team size, with indoor commonly played 6-on-6 and beach 2-on-2 (Triple F Sports).
A few sessions of beginner drills can tell you a lot before you ever register for a team. If your child enjoys the repetitions, asks to keep playing, and looks more curious than frustrated, that is a useful sign. From there, you can choose a program level that matches the player you actually have, not the one you hope appears after one practice.