
Measure the Hand First—Then Let the Glove Model Decide
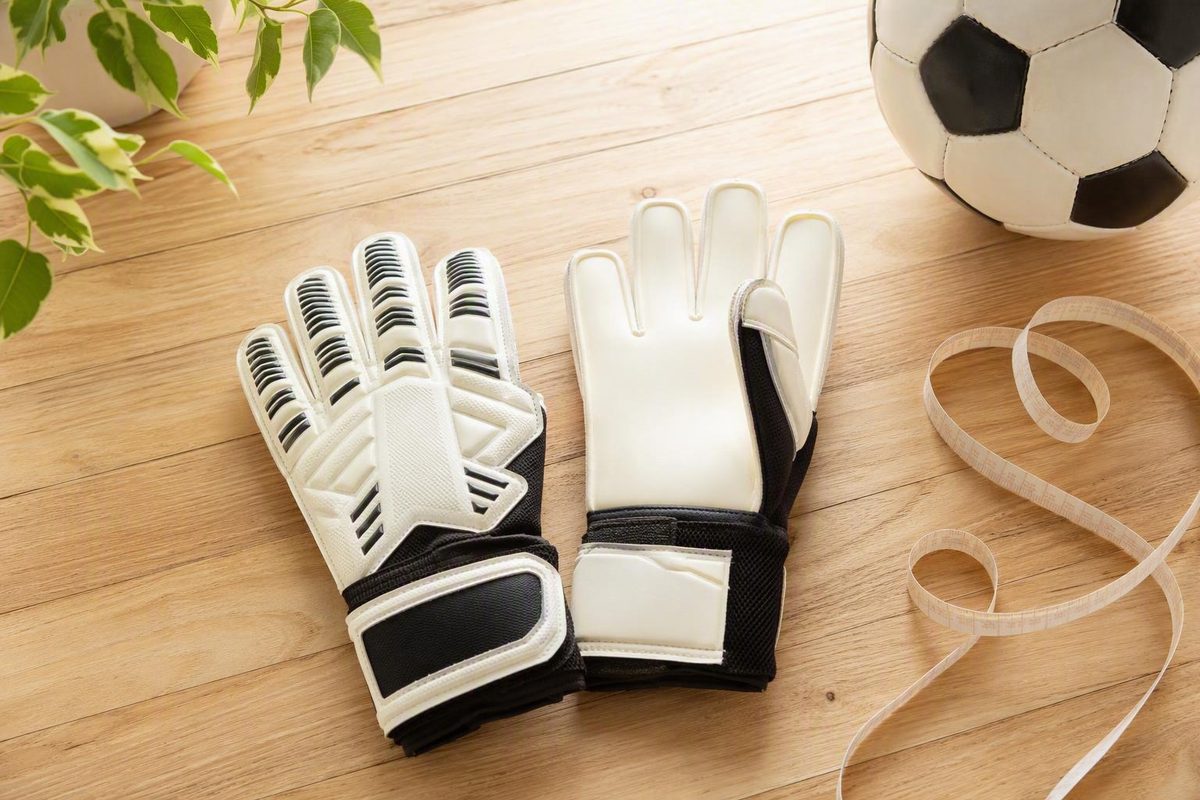
The required input may be one of four measurements: full hand length, wrapped palm circumference, straight-line hand width or middle-finger length.
Editorial note: This guide synthesizes manufacturer and specialist-retailer sizing instructions checked on August 16, 2026. It does not claim independent product testing. Because charts and models can change, recheck the current product page before ordering.
The quick answer: there is no universal goalie glove size
There is no single goalie glove size chart that works reliably across every brand and model. This guide covers soccer goalkeeper gloves.
Soccer goalkeeper gloves may be sized using any of four measurements:
- full hand length;
- wrapped palm circumference;
- straight-line hand width; or
- middle-finger length.
Those dimensions are not interchangeable. A hand-width measurement cannot be looked up in a palm-circumference table, and a middle-finger measurement cannot be converted through a full-hand-length formula.
Even when two gloves carry the same size number, they can fit differently because of the brand, model, cut, youth or adult construction, backhand material, and finger-protection design. A close-fitting negative-cut glove may feel noticeably different from a flat-cut glove in the same listed size. Likewise, youth size 7 and adult size 7 may use different finger lengths, widths, and proportions.
The safest buying rule is simple:
Find the chart for the exact brand and model first. Identify the measurement that chart requests, take that measurement, and use only that chart to select the initial size.
Do not blend several online charts into an “average” conversion. Manufacturers may be measuring entirely different parts of the hand.
Use this five-step process:
- Identify the chart method. Determine whether the exact glove model requests hand length, circumference, width, or finger length.
- Measure both hands. Record the requested dimension separately for the left and right hand.
- Use the larger relevant result unless that manufacturer specifically instructs you to measure the dominant hand.
- Select the chart size. Follow any model-specific direction about boundaries, rounding, or being between sizes.
- Perform a functional fit test. Check fingertip clearance, finger movement, palm stability, and wrist security before using the gloves.
Some retailers publish a shortcut that tells buyers to round a hand measurement up to the next whole inch and add one. That is not a universal goalkeeper-glove formula. Use it only when the selected manufacturer or seller explicitly calls for it.
Choose the measurement method required by the glove
Before reaching for a tape, open the size chart for the glove you intend to buy. The chart—not a generic measuring habit—determines where the tape goes.
Use this measurement-method selector:
| If the chart requests… | Measure… | Do not substitute… |
|---|---|---|
| Full hand length | From the chart’s stated palm base or wrist landmark to the tip of the middle finger | Middle-finger length alone |
| Palm circumference | Around the widest part of the palm below the knuckles, excluding the thumb | Straight-line width |
| Straight-line hand width | Across the widest part of the hand from side to side | Wrapped circumference |
| Middle-finger length | Only the middle finger, following the brand’s illustration | Full hand length |
Full hand length is the distance from a specified point at the base of the palm or wrist to the tip of the middle finger. The precise starting landmark varies. One chart might say “base of the palm,” another might use the wrist crease, and another may rely on an illustration. Follow the landmark shown by the relevant chart rather than assuming all length measurements begin in the same place.
Palm circumference is measured by wrapping a flexible tape around the widest portion of the palm below the knuckles. Leave the thumb outside the loop. The tape should follow the hand’s perimeter without squeezing it.
Straight-line hand width is a side-to-side measurement across the hand. The tape does not wrap behind the palm. Nike, for example, tells buyers to place the tape snugly across the widest part of the hand from left to right and publishes separate kids’ and adult charts based on that dimension.
Middle-finger length measures the finger rather than the whole hand. T1TAN uses this approach for its goalkeeper gloves, but a result from that method belongs only in T1TAN’s chart. It should not be carried into another brand’s hand-length table.
The distinction between width and circumference is especially important. Both are sometimes casually called “palm width,” even though one is a straight line and the other is a wrapped measurement. Check the diagram and instructions, not just the table’s column heading.
Before selecting a size, record:
- measurement method;
- result for each hand;
- unit used;
- brand;
- model;
- glove cut;
- youth, junior, or adult designation;
- presence of finger protection; and
- chart version or product page consulted.
This creates a usable sizing record. Writing only “size 7” provides too little information to help with a later replacement because the same number may represent a different hand measurement in another product.
How to measure a goalkeeper’s hands accurately
Gather these items before starting:
- a flexible measuring tape;
- paper, a printable worksheet, or a notes app;
- the chart for the selected glove model;
- a ruler; and
- string or yarn if no flexible tape is available.
String can substitute for a flexible tape when measuring a curve. Mark the point where it meets, lay it flat without stretching it, and measure it with the ruler. Tape is the preferred tool, but string or yarn is also identified as an alternative in Renegade GK’s measuring instructions.
To measure full hand length:
- Place the hand palm-up on a flat surface.
- Keep the fingers naturally together or positioned as the brand’s illustration shows.
- Relax the hand rather than stretching the middle finger.
- Place the end of the tape at the chart’s specified palm base or wrist crease.
- Measure in a straight line to the middle fingertip.
- Do not bend the tape over or around the fingertip.
Do not guess at the starting point. A different starting landmark can change where the result falls on the chart.
To measure palm circumference:
- Hold the hand open and relaxed.
- Wrap the tape around the widest part of the palm below the knuckles.
- Keep the thumb outside the loop.
- Make the tape snug enough to follow the palm but not tight enough to compress it.
- Keep the tape level rather than allowing it to slope diagonally.
To measure straight-line hand width:
- Lay the hand flat and relaxed.
- Find the widest side-to-side point across the hand.
- Place the tape or ruler from the left edge to the right edge.
- Record the straight-line distance.
- Do not wrap the tape around the back of the hand.
To measure middle-finger length:
- Follow the brand’s illustration to identify the finger’s starting point.
- Measure from that point to the fingertip.
- Keep the tape or ruler aligned with the finger.
- Record only the finger length—not the distance from the wrist or palm base.
Measure both hands separately. Although some guides direct players to measure the dominant hand, using both hands reveals any difference instead of assuming which is larger. Normally, use the larger result for the dimension requested by the chart. If the selected manufacturer explicitly requires the dominant hand, follow that instruction.
Keep the units consistent. If the product chart is in centimeters but your result is in inches, use a reliable unit converter rather than moving to a different brand’s inch-based chart. Preserve enough decimal precision to place the result correctly within the published range.
Repeat the measurement when:
- two attempts differ unexpectedly;
- the fingers were spread or curled;
- the hand was pressed firmly into the surface;
- the tape compressed the palm;
- the tape crossed the hand diagonally;
- the string stretched; or
- the result sits very close to a size boundary.
Two careful measurements taken in the same position are more useful than one hurried measurement recorded to excessive precision.
Brand-specific chart examples—and why they cannot be combined
The following examples demonstrate three incompatible sizing systems. They are not pieces of one universal goalie glove size chart.
Keeperstop’s retailer formula
Keeperstop’s stated method is to measure either full hand length or palm circumference, round up to the next whole inch, and add one:
- A 7-inch result becomes size 8.
- A 7.5-inch result rounds to 8 inches and then becomes size 9.
This is retailer guidance, not a guaranteed cross-brand conversion. It should be checked against the chosen glove brand and model, particularly when buying youth gloves or switching cuts. Keeperstop also describes sizing as inexact because hands, brands, cuts, and youth and adult ranges differ in its soccer goalie glove sizing guide.
T1TAN middle-finger chart
T1TAN asks buyers to measure the middle finger. Its published chart is:
| Middle-finger length | T1TAN glove size |
|---|---|
| 1.97–2.17 inches | 3 |
| 2.18–2.44 inches | 4 |
| 2.45–2.60 inches | 5 |
| 2.61–2.83 inches | 6 |
| 2.84–2.99 inches | 7 |
| 3.00–3.19 inches | 8 |
| 3.20–3.39 inches | 9 |
| 3.40–3.58 inches | 10 |
| 3.59–3.94 inches | 11 |
| 3.95–4.25 inches | 12 |
These are T1TAN-specific guidelines. The company notes that cut, backhand material, finger protection, and personal fit preference may affect the final choice on its middle-finger glove-size chart.
Nike adult straight-line width chart
Nike uses straight-line hand width and publishes separate adult and kids’ tables in its goalkeeper-glove size guide.
| Hand width | Nike adult size |
|---|---|
| 4.0–4.17 inches | 6 |
| 4.17–4.4 inches | 7 |
| 4.4–4.6 inches | 8 |
| 4.6–4.8 inches | 9 |
| 4.8–5.0 inches | 10 |
| 5.0–5.15 inches | 11 |
Nike kids’ straight-line width chart
| Hand width | Nike kids’ size |
|---|---|
| 3.1–3.3 inches | 3 |
| 3.3–3.5 inches | 4 |
| 3.5–3.7 inches | 5 |
| 3.9–4.1 inches | 6 |
| 4.3–4.5 inches | 7 |
| 4.5–4.7 inches | 8 |
The displayed kids’ ranges leave two uncovered intervals:
- 3.7–3.9 inches;
- 4.1–4.3 inches.
Do not fill those gaps by guessing the nearest size. Ask Nike or the seller about the exact model, or try the adjacent options while preserving their returnable condition.
Several printed endpoints in the Nike tables are also shared by adjacent ranges. This affects boundaries such as 4.17, 4.4, 4.6, 4.8, and 5.0 inches in the adult chart, as well as 3.3, 3.5, and 4.5 inches in the kids’ chart. If a measurement lands exactly on a shared endpoint, check the current model guidance or try both adjacent sizes rather than assuming which range controls.
The incompatibility among these examples is the main lesson:
- T1TAN’s input is middle-finger length.
- Nike’s input is straight-line hand width.
- Keeperstop’s formula may begin with full hand length or palm circumference and then applies its own arithmetic.
A player with a 4-inch Nike width does not have a 4-inch T1TAN finger or a 4-inch Keeperstop hand measurement. Combining those inputs would produce a number without a valid sizing meaning.
How properly sized goalie gloves should fit
The target is a glove that feels snug and secure but not restrictive. The player should be able to flex each finger, open and close the hand, and form a natural catching shape. The fingertips should not press into the ends, while the palm should remain reasonably stable inside the glove.
Approximately 1/4 to 1/2 inch of fingertip room can be used as a starting range, not as a universal specification. That range synthesizes commercial sizing guidance: Academy recommends about 1/4 inch, while Adidas publishes a broader allowance of approximately 0.5–1 inch. The exact model instructions and the functional try-on should take priority; Adidas also emphasizes a snug rather than overly tight fit in its goalkeeper-glove sizing guide.
Signs that a glove may be too small include:
- fingertips pressing against the glove ends;
- uncomfortable pressure across the palm or backhand;
- restricted finger flexion;
-
difficulty forming a comfortable catching shape;
-
a wrist closure that cannot fasten in its normal position.
Signs that a glove may be too large include:
-
excessive empty space beyond the fingertips;
-
the hand sliding inside the glove;
-
an unstable or poorly positioned wrist closure; or
- the glove shifting during a simulated catching motion.
A small amount of fingertip room is different from uncontrolled internal movement. The player should be able to move the glove as an extension of the hand without excessive palm folding or movement at the wrist.
Use this at-home fit test before wetting or marking the gloves:
- Insert the hands without forcing the fingers.
- Seat each finger fully in its glove finger.
- Secure the wrist closure normally.
- Flex every finger individually.
- Spread the hand, then close it.
- Form a relaxed catching shape with both hands.
- Mimic receiving a ball without using one if contact could mark the latex.
- Check for fingertip pressure, bunching, internal sliding, and wrist movement.
- Keep the gloves on briefly and reassess their comfort.
If the goalkeeper normally plays with wrist tape or an under-glove, include it during the try-on. Academy also advises trying gloves with normal wrist tape in its goalkeeper-glove buying guide.
This checklist evaluates comfort, mobility, and security. It does not establish that one amount of tightness or fingertip clearance will necessarily improve grip, protection, confidence, catching ability, or match performance.
What to do when the player is between sizes
Start with the exact model chart:
- Does the manufacturer explicitly say to round up? If yes, follow that direction.
- Does the measurement fall within one unambiguous range? Start with that size.
- Is it between ranges or on a shared boundary? Compare hand shape, cut, wrist security, and finger clearance.
- Do two measurements permitted by that chart indicate different sizes? Do not average them. Follow the model’s instructions and evaluate both likely sizes.
- Does neither adjacent size fit well? Consider another cut or model rather than forcing the choice.
When comparing adjacent sizes, look at four areas separately:
- Finger length: Do the fingertips press into the ends, or is there excessive empty space?
- Palm width: Is there uncomfortable pressure across the palm or loose material that bunches?
- Wrist security: Can the closure fasten normally without constriction or instability?
- Internal cut: Is the glove intended to fit close or leave more internal room?
Cut terminology provides a useful starting point:
- Negative cut: Generally closer around the fingers and hand.
- Reverse cut: Also generally close-fitting.
- Flat cut: Usually offers a roomier, more traditional internal feel.
- Roll-finger cut: Commonly feels roomier or bulkier around the fingers.
- Hybrid cut: Combines characteristics and must be judged model by model.
Moving up for a negative or reverse cut is conditional, not automatic. It is most relevant when the player is already at the top of the listed range, sits between sizes, or experiences excessive palm or finger pressure. N1, for example, advises choosing the next size for its negative-cut gloves when the measurement is at the top of a range, while describing its chart as guidance rather than a guarantee in the company’s size guide.
That observation is model-dependent. Initial resistance from a protective structure is not a reason to accept uncomfortable pressure, restricted movement, or fingertips pressing against the ends.
Some product-specific guides say their fingersave models loosen after initial sessions. Other sellers report that removing removable finger protection changes the internal feel. Treat both as product-specific observations—not promises that an undersized glove will correct itself. Do not remove protective components merely to force a fit unless the product is designed for removal and the resulting setup is appropriate for the player.
Before trying gloves on, review the seller’s exchange conditions. Return eligibility varies by seller, so keep the latex palms clean and unmarked until the fit is settled. Avoid training, catching a ball, removing films or tags, wetting the latex, or discarding packaging if the seller says those actions affect returns.
Youth goalie glove sizes: measure the child, not the birthday
A child’s hand measurement should control the decision. Age and height can identify a few sizes to investigate, but children of the same age may have different finger lengths, palm widths, and overall hand proportions.
Keeperstop provides this rough starting guide:
| Approximate age or category | Rough starting size |
|---|---|
| Ages 7–9 | Junior 4–5 |
| Ages 10–12 | Junior 6–7 |
| Small adult or large youth | Adult 7 |
These ranges are estimates, and the overlap between junior and adult sizing is one reason to check the relevant brand rather than relying on the size number alone. Keeperstop also states that youth size 7 and adult size 7 have different dimensions in its brand-oriented sizing guidance.
West Coast Goalkeeping publishes another product-oriented rough guide:
| Approximate age or category | Rough starting size |
|---|---|
| Ages 5–8 | 3 |
| Ages 7–9 | 4 |
| Ages 9–10 | 5 |
| Ages 10–12 | 6 |
| Youth to small adult | 7 |
The overlapping ages demonstrate the limitation of birthday-based sizing. A 7-year-old could appear in more than one starting band, and the right answer still depends on the child’s hand and the selected model. West Coast describes age and height as rough secondary indicators and directs buyers to model-specific charts in its goalkeeper glove size data.
Do not assume that youth size 7 and adult size 7 are equivalent. Depending on the product, youth gloves may use shorter fingers, narrower construction, and different overall proportions. The printed number alone does not establish equivalence.
When a child is moving from junior to adult construction:
- Remeasure both hands.
- Find the junior chart for the candidate model.
- Find the applicable adult chart.
- Confirm which dimension each chart uses.
- Compare the actual ranges rather than the repeated size number.
- Try both constructions if the hand falls into an overlap.
Remeasure before buying replacements for a growing player, especially when the previous gloves:
- press at the fingertips;
- restrict finger movement;
- feel tight across the backhand;
- no longer allow the wrist to close securely;
- have become difficult to put on; or
- were purchased using age alone.
The supplied guidance does not establish a fixed schedule such as measuring every three or six months. Growth varies. Practical triggers include a new purchase, a noticeable fit change, or a transition between junior and adult product ranges.
The final pre-purchase and try-on checklist
Use this worksheet before ordering. It can be copied into a document or printed.
| Sizing field | Left hand | Right hand | Notes |
|---|---|---|---|
| Full hand length | Starting landmark: | ||
| Palm circumference | Thumb excluded: Yes / No | ||
| Straight-line hand width | Wrapped tape: No | ||
| Middle-finger length | Brand illustration followed: Yes / No | ||
| Measurement unit | Inches / centimeters |
| Product field | Entry |
|---|---|
| Brand | |
| Exact model | |
| Kids, junior, or adult range | |
| Glove cut | |
| Finger protection | None / fixed / removable |
| Chart’s required measurement | |
| Chart result | |
| Larger relevant hand result used | |
| Manufacturer rounding instruction | |
| Seller and return deadline |
| Try-on check | Pass / concern | Notes |
|---|---|---|
| Fingertips clear of the ends | ||
| No excessive fingertip space | ||
| Every finger flexes comfortably | ||
| Hand forms a catching shape | ||
| No uncomfortable pressure | ||
| Palm does not bunch excessively | ||
| Hand does not slide internally | ||
| Wrist closure secures normally | ||
| Tested with usual wrist tape | ||
| Tested with usual under-glove |
Before paying, confirm all of the following:
- The measurement came from the chart for the exact model, not a similarly named retailer table.
- The selected chart is for the correct kids, junior, adult, or model-specific range.
- Width was not substituted for circumference.
- Middle-finger length was not substituted for full hand length.
- Both hands were measured and recorded.
- The units match the chart.
- Any instruction to round up was applied only where that chart called for it.
- The cut and finger-protection system were considered.
- The seller’s exchange rules were checked.
If two valid measurements point toward different sizes, do not average the numbers. An average of hand length and circumference has no anatomical or chart-based meaning. Instead, read the model instructions again and compare the likely sizes for finger clearance, palm width, internal cut, and wrist closure.
During the try-on, wear the same wrist tape or under-glove normally used in play. Flex every finger, form a catching shape, and check for bunching, sliding, uncomfortable pressure, and wrist instability. Do this without marking the latex.
Do not assume that a size transfers:
- from one brand to another;
- between two models from the same brand;
- from a flat cut to a negative cut;
- from an unprotected glove to a fingersave model; or
- from junior to adult construction.
Check the return or exchange conditions before opening the packaging beyond what is necessary for a permitted try-on. Until the size is confirmed, avoid wetting the gloves, training in them, catching abrasive or dirty balls, writing on them, or removing anything the seller requires for a return.
The practical hierarchy is:
- Exact model chart first
- Measured hand dimensions second
- Functional try-on third
- Age or height only as a rough fallback
The safest answer to goalie glove sizing is not a universal number. Identify the exact soccer glove model, use the measurement its chart requests, measure both hands, and verify fingertip room, finger movement, palm stability, and wrist security during a careful try-on. For children, treat age and height only as starting clues. Remeasure rather than assuming last season’s size—or the same number in an adult glove—will still fit.
Frequently asked questions
Is soccer goalie glove size the same as hockey goalie glove size?
No. This guide addresses soccer goalkeeper gloves. Ice-hockey goalies use catching gloves and blockers with a different equipment design and sizing system. Do not apply soccer hand measurements, size numbers, or conversion formulas to hockey goalie equipment.
Should I measure the dominant hand or both hands?
Measure both. Some manufacturer or retailer instructions specify the dominant hand, but measuring both identifies which hand is actually larger. Record the results separately and normally use the larger relevant measurement unless the exact model instructions expressly tell you to use the dominant hand.
Are youth and adult goalkeeper gloves with the same size number equivalent?
Not necessarily. Youth and adult gloves with the same printed number may differ in finger length, width, and overall proportions. Use the separate youth or adult chart for the exact model. When moving between constructions, remeasure instead of carrying the old number forward.
Should I buy a larger size for negative-cut or fingersave gloves?
Not automatically. Negative and reverse cuts generally feel closer, so the next size may be worth trying when the player is between sizes or at the top of a chart range. Fingersave structures can also make some models feel stiffer or tighter, but that does not mean every player needs a larger size. Compare finger clearance, palm pressure, movement, and wrist security in the exact model.
Can I use the same goalie glove size when switching brands?
Use the old size only as a starting clue. Different brands—and sometimes different models from the same brand—may use different measurements, proportions, cuts, and internal volumes. Find the new model’s chart, measure the requested dimension again, and confirm the result with a try-on.