
Measure First, Then Check the Fit on Skates
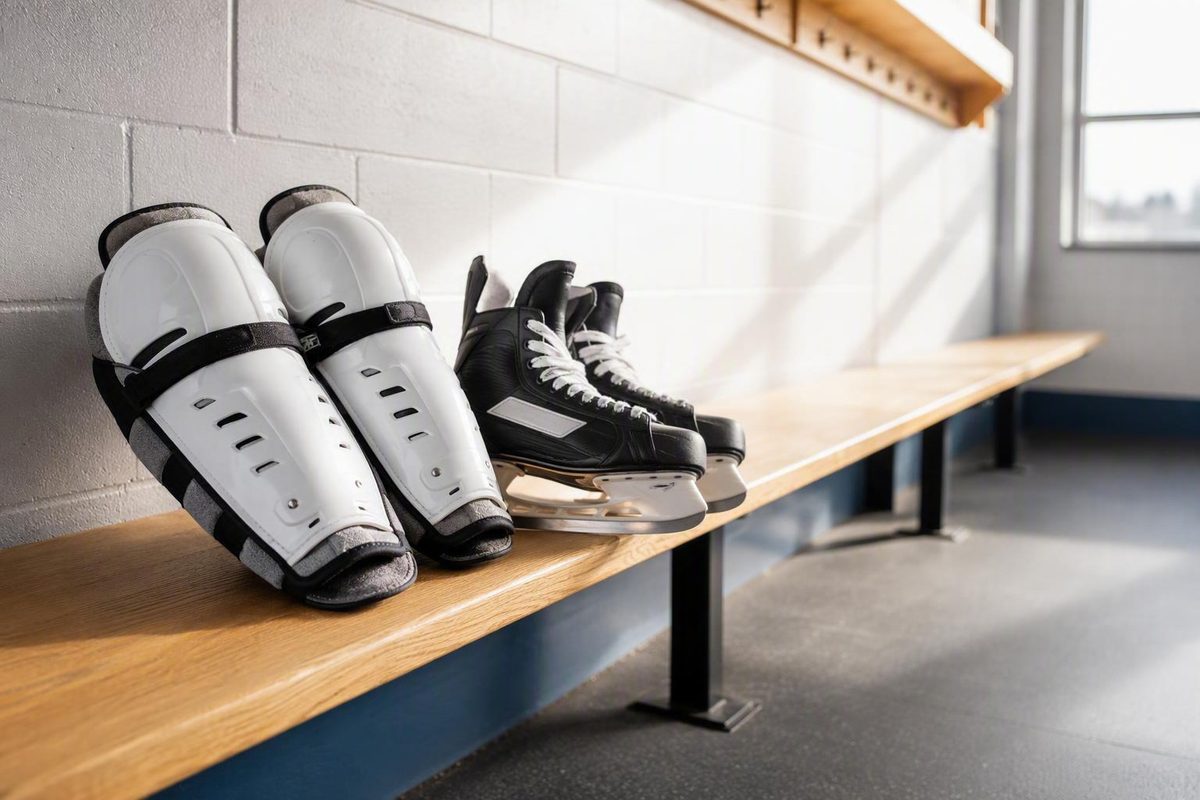
A Bauer guard labeled 15 inches corresponds to a 17-18-inch anatomical shin length. Use exact-model endpoints, then verify fit with tied skates.
Measure first, then check the fit on skates.
A hockey shin guard size chart can identify the first size to try, but it cannot confirm the final fit. Players of the same height can have different leg proportions, and brands do not always define shin length with the same measurement endpoints.
Use this process:
- Identify the exact brand and model.
- Read how that product defines its leg measurement.
- Measure between those specified points.
- Use height only as a secondary estimate.
- Try the guard with tied skates and hockey pants.
- Confirm knee alignment, lower-leg coverage, calf security, and ankle mobility.
Hockey shin guard sizes at a glance
Ice-hockey sizing only: These charts and fitting instructions are for ice-hockey shin guards. Do not apply them to field-hockey or soccer shin guards.
The following chart is a general retailer-derived starting guide, not a universal sizing standard. Its measurement column says “knee cap to ankle,” while the accompanying fitting instructions measure from the center of the kneecap to the top of the skate boot. Those endpoints are not interchangeable, so defer to the instructions for the exact guard being purchased. The published ranges below come from HockeyMonkey’s shin-guard sizing guide.
| Shopping category | Guard size | Chart wording: “knee cap to ankle” | Player height |
|---|---|---|---|
| Youth | 7 in | 6–7 in | 3‘3”–4‘5” |
| Youth | 8 in | 7–8 in | 3‘9”–4‘7” |
| Youth | 9 in | 8–9 in | 4‘3”–4‘9” |
| Junior | 10 in | 9–11 in | 4‘5”–4‘11” |
| Junior | 11 in | 10–11 in | 4‘7”–5‘1” |
| Junior | 12 in | 10–12 in | 4‘9”–5‘4” |
| Senior | 13 in | 12–13 in | 5‘5”–5‘9” |
| Senior | 14 in | 13–14 in | 5‘7”–5‘11” |
| Senior | 15 in | 14–15 in | 5‘9”–6‘1” |
| Senior | 16 in | 15–16 in | 5‘11”–6‘3” |
| Senior | 17 in | 16–17 in | 6‘1”–6‘3” |
| Senior | 18 in | 17–18 in | 6‘3” or taller |
Short answer: Start with the size indicated by the applicable direct measurement, then try that size while wearing tied skates. If the exact model defines a different measurement method, follow the model-specific chart instead.
The overlapping height ranges should be read as starting estimates rather than unique answers. A player who is 5‘9”, for example, appears in multiple rows because overall height does not reveal how much of that height comes from the legs rather than the torso.
Treat “youth,” “junior,” “intermediate,” and “senior” as shopping categories. They can help locate products, but they should not override a direct measurement or on-body fit test.
This general chart also omits an intermediate category, whereas some manufacturer charts include one. That is another reason not to base the decision on the category name alone.
How to measure for hockey shin guards
Check the instructions for the exact model before taking the measurement. Two methods that begin at the kneecap can produce different numbers if one ends at the ankle and the other ends at the skate boot.
Preparation checklist
For the common knee-to-boot method:
- Use the skates the player will wear during play.
- Put on the usual socks or base layer.
- Tie the skates with the player’s normal lacing tension.
- Sit on a chair or bench.
- Bend the knee to approximately 90 degrees.
- Keep the lower leg in a natural position rather than extending the foot forward.
- Use a flexible measuring tape. If none is available, use string and compare it with a ruler.
Measure from the center of the kneecap to the top of the skate boot. Direct shin measurement should be treated as the primary sizing indicator, with player height used only as a secondary guide.
Some retailer methods round a between-inch result up to obtain the initial size. That result is still only a starting point and must be checked on the player. HockeyStickMan, for example, instructs players to wear tied skates, sit with the legs at approximately 90 degrees, and round up a between-inch measurement (HockeyStickMan’s measuring guide).
Measurement-point diagram
                    Front/side view of bent leg

                         ● A
                    Center of kneecap
│\
│ \
│ Use this route only if the
│ applicable chart specifies it
                         │
                         │
                         ● B  Center of outer ankle
/ \
/ \____ ● C Top of skate boot
                      /
                ● D  Top of skate tongue
Diagram key
- A: Center of the kneecap
- B: Center of the outer ankle
- C: Top of the skate boot
- D: Top of the skate tongue
Important: Use only the endpoints specified by the applicable product chart. Do not enter an A-to-B measurement into an A-to-C chart, or vice versa. Follow a tongue-based method only when the product or sizing guide specifically calls for it.
Why a Bauer measurement is different
Bauer defines anatomical shin length as the distance from the center of the kneecap to the center of the outer ankle. That is not the same as measuring from the kneecap to the top of a tied skate boot.
The number printed on a Bauer guard is also not presented as an equal-length anatomical measurement. For example, Bauer pairs an 8-inch guard with a 10–11-inch anatomical shin-length range. A player with a Bauer-defined 15-inch anatomical shin is therefore not automatically looking for a guard labeled 15 inches.
Five-step measuring box
Print-friendly measuring steps
- Identify the exact model. Record the brand, product line, and model or generation.
- Read its endpoint definition. Confirm whether the measurement ends at the outer ankle, skate-boot top, tongue top, or another specified point.
- Put on and tie the skates if instructed. Use the player’s normal skating setup.
- Measure with the knee bent. Sit naturally and measure between the specified points.
- Record inches and centimeters. Keep both values, but do not combine measurements taken with different endpoint methods. Published centimeter figures may also be rounded rather than exact conversions.
Writing down the method matters as much as recording the number. “15 inches, kneecap to boot top” is useful; “15 inches” by itself is ambiguous.
Bauer shin-pad size chart
This is a Bauer-specific manufacturer chart, not a universal hockey shin guard chart. Bauer defines shin length as the distance from the center of the kneecap to the center of the outer ankle. Its chart uses age, weight, height, and anatomical shin length across youth, junior, intermediate, and senior categories (Bauer’s official shin-pad size guide).
| Bauer category and size | Guard label | Age | Weight | Height | Bauer anatomical shin length |
|---|---|---|---|---|---|
| Youth S | 8 in | 3–5 | 31–42 lb / 14–19 kg | 3‘0”–3‘6” / 0.91–1.07 m | 10–11 in / 25.5–28 cm |
| Youth M | 9 in | 5–7 | 40–53 lb / 18–24 kg | 3‘5”–3‘11” / 1.04–1.19 m | 11–12 in / 28–31 cm |
| Youth L | 10 in | 7–9 | 51–64 lb / 23–29 kg | 3‘10”–4‘5” / 1.17–1.35 m | 12–13 in / 31–33.5 cm |
| Junior S | 11 in | 8–10 | 53–68 lb / 24–31 kg | 4‘2”–4‘8” / 1.27–1.42 m | 13–14 in / 33.5–36 cm |
| Junior M | 12 in | 10–11 | 66–79 lb / 30–36 kg | 4‘7”–4‘11” / 1.40–1.50 m | 14–15 in / 36–38.5 cm |
| Intermediate M | 13 in | 11–13 | 79–99 lb / 36–45 kg | 4‘10”–5‘5” / 1.47–1.65 m | 15–16 in / 38.5–41 cm |
| Intermediate L | 14 in | 13 or older | 97–150 lb / 44–68 kg | 5‘5”–5‘9” / 1.65–1.75 m | 16–17 in / 41–43.5 cm |
| Senior M | 15 in | 14 or older | 130–170 lb / 59–77 kg | 5‘7”–5‘11” / 1.70–1.80 m | 17–18 in / 43.5–46 cm |
| Senior L | 16 in | 15 or older | 150–190 lb / 68–86 kg | 5‘9”–6‘1” / 1.75–1.85 m | 18–19 in / 46–48.5 cm |
| Senior XL | 17 in | 15 or older | 170–209 lb / 77–95 kg | 5‘11”–6‘5” / 1.80–1.95 m | 19–20 in / 48.5–51.5 cm |
| Senior XXL | 18 in | 15 or older | 190–229 lb / 86–104 kg | 6‘1”–6‘7” / 1.85–2.00 m | At least 20 in / 51.5 cm |
Age, weight, and height overlap between rows. Bauer’s chart does not state a formal priority rule for cases in which the indicators point toward different sizes. Do not invent one. Confirm the result against the guidance for the exact Bauer product and then check the guard on the player.
The common interpretation error is treating the guard label as the required anatomical length. In the Senior M row, for example, the guard is labeled 15 inches, but the associated Bauer-defined anatomical shin length is 17–18 inches. A 15-inch kneecap-to-outer-ankle measurement is not, by itself, evidence that the player needs a guard labeled 15 inches.
Keep “guard label” and “measured shin length” as separate fields when recording measurements or comparing products.
Why CCM and other charts may give a different answer
No chart supports treating sizes as interchangeable across every brand and model. A number printed on one guard may not represent the same body measurement or practical fit as the same number printed on another.
- Bauer anatomical shin length: Center of the kneecap to the center of the outer ankle.
- CCM Next retailer method: Middle of the knee to the top of the skate boot, measured while seated with the knee bent approximately 90 degrees.
A measurement taken for one system cannot simply be transferred into the other.
Limited CCM Next retailer chart
The following table applies only to CCM Next Hockey Shin Guards and covers three senior sizes. It is a third-party retailer chart rather than a general CCM manufacturer chart (SkatePro’s CCM Next size guide).
| CCM Next size | Player height | Knee-to-boot measurement |
|---|---|---|
| 14 | 5‘4”–5‘8” | 14–15 in |
| 15 | 5‘8”–6‘0” | 15–16 in |
| 16 | 6‘0”–6‘4” | 16–17 in |
Do not use the page’s size-16 metric height figure of 162–192 cm as reliable sizing information without confirming it. It conflicts with the same page’s imperial range of 6‘0”–6‘4”.
Do not generalize this limited table to every current CCM shin guard. A different product line, generation, or fit profile may use different ranges or instructions.
Historical multi-brand retailer data further illustrate why height alone is insufficient. A player near 5‘6” could fall within a 13-inch Bauer-style height range but a 14-inch CCM range. The undated table also contains Easton and Reebok listings, so it should be treated as evidence of brand variability—not proof of current products, availability, or sizing (Pure Hockey’s multi-brand chart).
The practical rule is:
- Find the chart for the exact model.
- Follow that chart’s measurement definition.
- Use height to identify the first candidate, not to settle the fit.
- If the player is close to a boundary, test both adjacent sizes in the same equipment setup.
How to check the fit with skates and hockey pants
Fit the guards while the player is seated. After fastening them, have the player stand with the knees slightly bent in an athletic stance.
Start with the knee cup
Place the kneecap in the hard knee cup while the knee is slightly bent. The kneecap should remain centered rather than sitting above or below the cup.
Reject a size if obtaining lower-leg coverage requires pulling the guard so high or low that the knee no longer sits in its intended position. The knee cup is an alignment point, not something to shift merely to make the bottom of the guard reach the skate.
Check the lower end against the skate
The lower edge should reach the skate area without piling into the boot or preventing normal ankle flexion. An obvious uncovered area between the guard and skate can indicate that the guard is too short or incorrectly positioned.
Some contact with the tongue or upper boot may depend on the model and wearing style. The practical question is whether the guard stays aligned without jamming into the skate or limiting movement.
Check the calf wrap
The calf padding should wrap around the lower leg. Straps or closures should hold the guard in place with normal fastening tension.
Persistent rotation means the fit should be reassessed. Recenter and refasten the guard once; if it continues to turn away from the shin, compare an adjacent size or differently shaped model. Do not use extreme strap tension to force a poor-fitting shell to remain aligned.
Check the hockey pants
Hockey pants should extend to about the middle of the kneecap and overlap the top of the shin guard rather than leave an obvious bare gap. There is no supported universal numerical overlap requirement, so check continuity while the player bends and moves. These knee, boot, calf, and pants checks are described in The Hockey Depot’s measurement and fit guide.
Run a movement test
With skates tied and hockey pants on, ask the player to:
- bend both knees;
- perform a controlled squat;
- walk several steps;
- take several skating-like strides; and
- return to a bent-knee athletic stance.
Afterward, recheck the knee position, calf security, lower-edge position, ankle mobility, and rotation.
Six-item pass/fail scorecard
| Fit check | Pass | Fail |
|---|---|---|
| 1. Knee centered | Kneecap remains centered in the hard cup | Knee sits above, below, or outside the intended cup position |
| 2. Lower leg covered | Shell and padding cover the intended lower-leg area | An obvious uncovered area remains because the guard is too short or misplaced |
| 3. No exposed ankle-area gap | Guard reaches the skate area in the player’s normal stance | A clear gap appears between the guard and skate |
| 4. Calf wrap secure | Padding wraps the calf and closures hold normally | Guard feels loose or requires extreme tightening |
| 5. No substantial rotation | Guard remains facing forward after movement | Guard repeatedly turns away from the shin |
| 6. No boot or ankle interference | Player can flex the ankle and move normally | Guard piles into the boot, causes discomfort, or restricts motion |
A chart result is not the final answer if the player fails these checks. Reposition and refasten the guard once. If the problem remains, compare an adjacent size or another model.
What to do when the player is between sizes
Do not automatically select the larger guard. Try both adjacent sizes using the same:
- skates;
- hockey socks;
- hockey pants;
- base layers;
- tongue position; and
- normal lacing tension.
Changing the equipment setup between try-ons makes the comparison less useful.
For each candidate, place the knee correctly in the cup first. Then fasten the calf wrap normally. Do not pull the guard away from its intended position or overtighten the straps simply to make an unsuitable size stay aligned.
Compare the two sizes on five criteria:
- Stable knee alignment: Does the kneecap stay centered before and after movement?
- Lower-leg and ankle coverage: Does the guard reach the skate area without leaving an obvious gap?
- Boot contact: Does the shell sit cleanly, or does it pile into the skate?
- Ankle mobility: Can the player flex the ankle and take skating-like strides naturally?
- Resistance to rotation: Does the guard remain facing forward with normal fastening?
Height should not resolve a conflict with direct measurement, nor should it override a failed fit test. Players of equal height can have different leg proportions.
For Bauer products, age, weight, height, and anatomical shin length may point toward different rows. Bauer’s chart does not state which indicator formally takes priority. Consult the guidance for the exact product and use the on-body result rather than creating a universal hierarchy.
For a growing child, allow only modest room while preserving knee-cup alignment. Do not buy a substantially oversized guard merely to extend its usable life. If the larger size displaces the knee, piles into the skate, rotates, or limits ankle movement, it does not fit the child now (Better Hockey’s fit guide).
Reassess the guards after:
- a noticeable growth spurt;
- changing skate models;
- changing hockey pants;
- switching between over-the-tongue and under-the-tongue wear; or
- changing how the skates are tied.
Too small, too large, or simply worn differently?
A guard that feels wrong is not always the wrong labeled size. Determine whether the problem is insufficient length, excessive length, positioning, fastening, or a different tongue configuration.
Signs a guard may be too small
- The kneecap or ankle area becomes exposed.
- The lower leg lacks adequate coverage.
- The knee does not remain centered in the cup during a bent-knee stance.
- Pulling the guard down to reach the skate moves the cup below the knee.
- An obvious gap appears when the player squats or assumes a skating stance.
Signs a guard may be too large
- The shell or padding piles into the skate.
- The knee sits above or below the intended cup position.
- Material bunches around the lower leg or ankle.
- The guard causes persistent discomfort.
- Ankle flexion or skating-like movement feels restricted.
- Correct knee placement leaves excessive material at the boot.
Over the tongue versus under the tongue
Both over-the-tongue and under-the-tongue wear are used. The chosen setup can change where the lower edge sits and how long the same guard feels.
Retailer guidance is not uniform. HockeyMonkey notes that over-the-tongue players may prefer a larger size and under-the-tongue players may prefer a smaller one. By contrast, HockeyStickMan’s method tells over-the-tongue players to begin the measurement one inch below the top of the tongue, while under-the-tongue players measure from the tongue top.
Neither approach establishes a universal rule such as “always size up over the tongue.” Measure and test the guard in the configuration the player will use. If the tongue position changes later, repeat the knee-alignment, gap, boot-interference, and ankle-mobility checks.
What persistent rotation means
If the guard rotates:
- Remove and recenter it.
- Confirm that the knee is seated in the cup.
- Fasten the calf wrap with normal tension.
- Repeat the bend, squat, walk, and stride test.
- Compare an adjacent size if rotation continues.
- Consider another model if both adjacent sizes fit poorly around the calf.
Do not rely on overtightened straps to compensate for a shell that is too large or poorly shaped for the player’s leg.
Check condition separately from size
A correctly sized guard may still need replacement. Check for:
- cracked plastic;
- foam that remains compressed instead of rebounding;
- failed straps or closures; and
- a fit the player has outgrown.
These are condition and service-life issues, not reasons to manipulate the size selection. Replacement guidance identifies cracked plastic, non-rebounding foam, failed closures, and outgrown fit as reasons to retire a guard (Better Hockey’s guard-and-pants fit guide).
What size hockey shin guards does my child need?
Begin with the chart for the child’s exact brand and model. Take the direct leg measurement using that chart’s specified endpoints, then use height and the youth, junior, intermediate, or senior category only to identify a likely starting size.
Try the indicated size with tied skates and hockey pants. If the measurement is near a boundary or the guard fails the on-body scorecard, compare both adjacent sizes.
Should hockey shin guards be measured to the ankle or the top of the skate boot?
It depends on the applicable chart. Bauer defines anatomical shin length from the center of the kneecap to the center of the outer ankle. Many retailer methods measure from the kneecap or middle of the knee to the top of the skate boot.
Neither endpoint is universally correct. Use the method specified for the exact product, and never enter a knee-to-ankle number into a knee-to-boot chart.
Are hockey shin-guard sizes the same across Bauer and CCM?
No. The available charts do not support treating all Bauer and CCM sizes as interchangeable. Product guides can use different endpoints, ranges, categories, and relationships between measured shin length and printed guard size.
Find the chart for the exact model. A generic height chart can identify the first size to try, but the final choice requires the applicable measurement method and an on-body test.
Should shin guards go over or under the skate tongue?
Either configuration can be used, but the choice changes how the guard sits against the skate and how long it feels.
Measure and try on the guards using the player’s normal tongue position. Do not fit the guard under the tongue in the store and then move it over the tongue for play without repeating the fit checks.
How much growing room should a child have in hockey shin guards?
There is no supported universal numerical allowance. Use the modest-room rule above and preserve the fit required by the scorecard rather than buying substantially oversized guards in advance.
Recheck the fit after growth spurts. If the child no longer passes the knee-alignment, coverage, rotation, boot-contact, or movement checks, compare the next size.
Final parent checklist
- Identify the exact product. Record the brand, model, and generation instead of shopping by size number alone.
- Use that product’s endpoints. Keep kneecap-to-boot and kneecap-to-outer-ankle measurements separate.
- Treat height as an estimate. Use it to choose the first guard to try, not to declare the fit correct.
- Compare adjacent sizes when needed. Do not automatically choose the larger one.
- Test in full equipment. Use tied skates, hockey pants, normal socks, and the player’s usual tongue position.
- Apply the scorecard. Reject any option that loses knee alignment, leaves an obvious gap, rotates substantially, piles into the skate, or restricts ankle movement.