
A Parent’s Guide to Finding a Mouthguard That Fits and Gets Worn
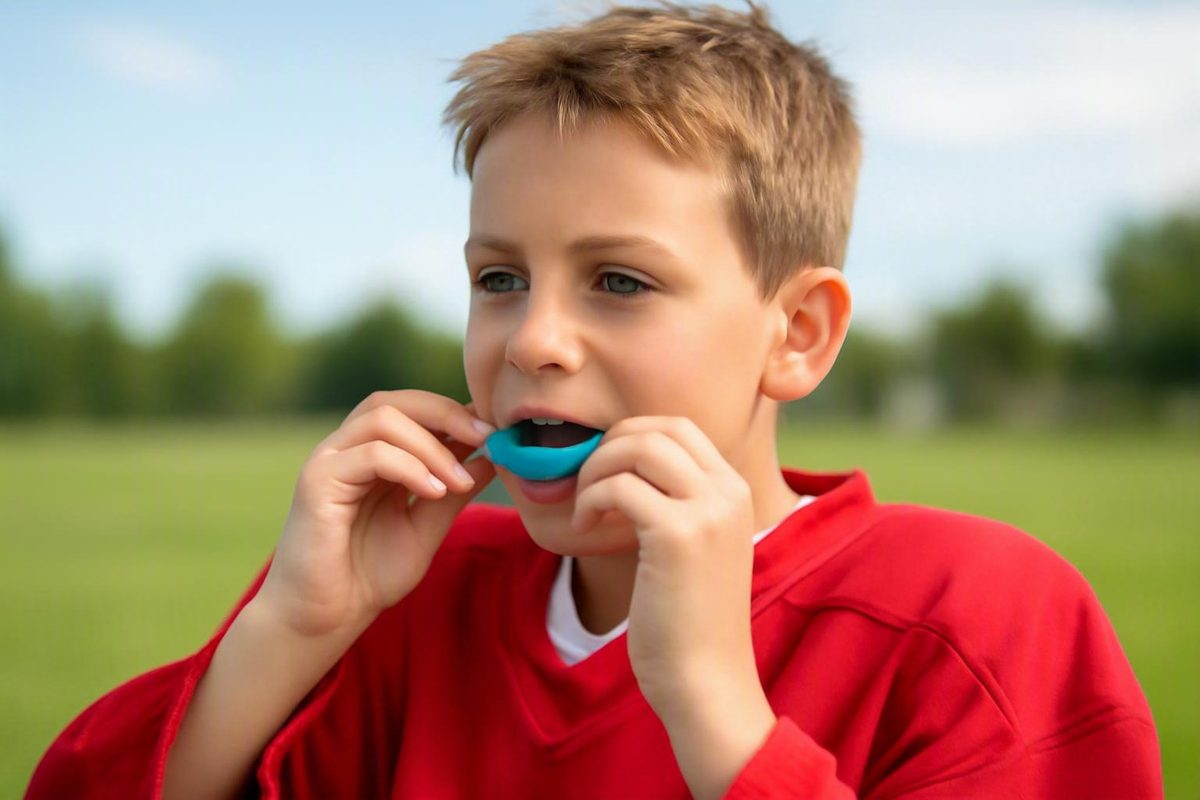
One model can serve ice and field hockey only if its maker approves both and it complies with each competition's rules, so a generic "hockey" label is not enough.
A hockey gum shield is not something to choose by headline protection level alone. The practical goal is a mouthguard suited to the player’s form of hockey, dental development, braces, helmet setup, and budget—and comfortable enough to remain in place throughout play.
“Gum shield” and “mouthguard” refer to the same general type of protective device. Its primary intended role is to help protect the teeth and oral soft tissues from impact. It cannot make the mouth injury-proof or guarantee that every dental or facial injury will be prevented.
This guide focuses on shopping, fit, braces, care, and replacement. Competition requirements vary, so parents should verify current rules directly with the player’s team, league, school, tournament organizer, or governing body.
Start Here: Ice Hockey or Field Hockey?
Before comparing brands, sizes, or prices, identify whether the guard is for:
- Ice hockey
- Field hockey
- Roller or street hockey
- More than one hockey discipline
That distinction matters because equipment, likely sources of impact, and competition rules can differ. In ice hockey, the mouth may be exposed to sticks, pucks, falls, boards, checks, and player contact. Field hockey involves sticks, a hard ball, falls, and close contact. Roller and street hockey use different combinations of surfaces, helmets, cages, and local rules.
Commercial ranges reflect those differences. Ice-hockey listings include products intended for use with caged helmets, including tethered designs. Field-hockey retailers carry separate youth, adult, braces-oriented, home-fit, and custom-fit assortments; for example, the Longstreth field-hockey collection lists junior, adult, braces, and custom-fit products. That shows availability, not comparative effectiveness.
Do not assume that a guard marketed for field hockey is appropriate for ice hockey, or vice versa. Before buying, check:
- the sports named by the manufacturer;
- the fitting and use instructions;
- whether a strap or tether is compatible with the helmet;
- whether that attachment is permitted under the applicable rules;
- the player’s age or competition division;
- current team, school, league, tournament, and governing-body requirements.
If a child plays several forms of hockey, look for explicit manufacturer approval for each discipline. A retailer category or generic “hockey” product title is not enough to establish cross-sport suitability. If the instructions are ambiguous, ask the manufacturer and the relevant competition organizer.
Quick recommendation
Choose the hockey discipline first. Then compare:
- braces and ongoing dental changes;
- fit type;
- model-specific sizing;
- strap or tether needs;
- comfort and retention;
- price and likely replacement cost;
- current local rules.
Stock, Boil-and-Bite, Remoldable, or Custom: The Main Fit Types
One commercial hockey guide describes three mouthguard types: stock, boil-and-bite, and custom Hockey Mouthguard Guide: Types & Fitting | Better Hockey – Better Hockey US. These labels describe fitting methods; they are not universal, independently tested rankings of protection.
| Fit type | Fit method | Retention potential | Convenience | Remoldability | Braces considerations | Typical price tier | Main limitations | Likely use case |
|---|---|---|---|---|---|---|---|---|
| Stock or ready-made | Used in its supplied shape | Variable because the shape has limited adaptation to the individual mouth | Immediately usable | Usually none | Use only when explicitly approved for braces | Low | May feel loose or bulky; little or no shaping | Emergency backup, short-term need, or a player who obtains a secure fit |
| Boil-and-bite | Heated and shaped at home | Can be secure when the size and molding are correct | Widely available, but fitting requires care | Product-specific | Do not tightly mold an ordinary model over fixed braces | Low to mid | Incorrect molding can produce slipping, pressure, or excess bulk | Many recreational players without complex dental needs |
| Self-fit or remoldable | Fitted at home using the manufacturer’s particular process | Depends on the design and quality of fitting | May allow another fitting attempt | Varies by model | Dedicated braces instructions may differ substantially | Low to mid | “Instant fit” and “remoldable” are not standardized terms | Growing players or families that value permitted refitting |
| Scanned or dentist-made custom | Made from an impression or digital scan | Designed around the wearer’s individual dental shape | Requires an appointment, impression, or scan | Usually not remolded at home | Can incorporate professional dental or orthodontic input | High | Greater cost, lead time, and replacement expense after growth | Persistent fit problems, low tolerance for bulk, frequent play, or complex dental needs |
Stock and ready-made guards
A stock guard can be used without heating, scanning, or molding. That simplicity may be useful when a guard is required immediately or as a spare.
The tradeoff is limited adaptation to the player’s dental arch. “Ready-made” does not automatically mean unusable, but fit must be tested rather than assumed. A guard that falls away or requires continuous biting to hold it in place needs reassessment.
Boil-and-bite guards
A boil-and-bite guard is softened and molded at home. Successful fitting depends on choosing the correct size and following that model’s exact instructions for heating, positioning, shaping, cooling, and testing.
Water temperature and heating time are not interchangeable between products. A failed first molding also does not prove that every boil-and-bite guard is unsuitable. Depending on the manufacturer’s directions, the player may need a permitted remolding attempt, another size, or a different design.
A correctly fitted retail guard may be practical for many recreational players. It is not an adequate choice when it remains loose, painful, difficult to breathe with, or repeatedly removed.
“Instant fit,” “self-fit,” and “remoldable”
These are product-specific commercial descriptions rather than standardized protection categories. Likewise, “remoldable” does not reveal how many attempts are allowed or whether refitting is appropriate around braces.
Treat these labels as prompts to read the instructions—not as evidence that one product provides greater protection.
Scanned and dentist-made custom guards
Custom guards are formed from an impression or digital scan of the wearer’s teeth. Some are supplied through dentists, while others use commercial scanning networks. GuardLab, for example, distinguishes home-molded guards from products requiring a 3D scan within its hockey mouthguard range.
An individualized fitting process and higher price are purchasing considerations, not proof that every custom guard is safer than every correctly fitted retail guard. A custom option may be worth discussing when a player:
- trains or competes frequently;
- repeatedly loses retention with retail guards;
- cannot tolerate a bulky profile;
- has an unusual dental arch;
- needs coordination with dental or orthodontic treatment;
- consistently removes other guards during play.
The supplied evidence does not provide enough direct hockey-specific comparative research to rank stock, boil-and-bite, remoldable, and custom guards in a universal order of protection. Fit, condition, sport suitability, and consistent use are more defensible decision points than the category name alone.
The Parent’s Buying Decision: Age, Playing Frequency, Equipment, and Budget
Use the same decision process every time a guard needs replacing.
1. Identify the hockey discipline
Confirm whether the guard is for ice, field, roller, street hockey, or several disciplines. Look for the intended sport in the manufacturer’s description and instructions, not only in a retailer’s search category.
2. Check current rules
Ask the coach or team manager which rulebook applies, then verify it through the relevant official source. Look for requirements involving:
- mandatory use;
- age or division;
- color;
- attachment to a helmet;
- coverage or construction;
- prohibited designs.
Do not rely on a teammate’s setup, an old equipment list, or what was accepted last season. Requirements may differ between competitions and can change.
3. Establish whether the player has braces
Fixed braces change the buying path. Choose a model explicitly designed or approved for braces, then ask the child’s orthodontist whether it is appropriate for the particular appliance.
Do not buy an ordinary tightly molded guard with the intention of improvising room around brackets or wires.
4. Choose a fit category
Decide whether the family is comfortable with:
- a ready-made guard;
- home molding;
- a product-specific remolding process;
- an impression or digital scan.
Playing frequency should be treated as a fit and convenience consideration, not as proof that an expensive product is required. Frequent players may place more value on stable retention, comfort, straightforward replacement, and permitted refitting.
5. Decide whether a helmet tether is relevant
For caged-helmet sports, determine whether a tether is compatible with the helmet and accepted under the applicable rules. It must not pull the guard out of position, distort it, or obstruct correct insertion and removal.
6. Use the model-specific size chart
Do not translate “junior” in one brand directly into “youth” in another. Manufacturers may base sizing on age, height, dental-arch shape, or labels such as small, medium, and large.
When the child sits near a size boundary, ask the seller or manufacturer how that particular model should be selected. Do not guess based on another brand’s system.
7. Set a whole-season budget
Include more than the initial guard:
- a ventilated hard case;
- replacement after growth or damage;
- a backup for travel or tournaments;
- fitting or scanning charges;
- shipping and tax;
- possible orthodontic reassessment.
A heavily marketed guard left in the equipment bag is a poor purchase. Comfort matters because a child who repeatedly chews, removes, or refuses the guard will not use it consistently.
Colors, flavors, personalization, and preferred profiles may help a player accept or identify a guard, but they are preference and ownership features—not evidence of protective performance. The same caution applies to retailer reviews, professional-use claims, partner logos, branded protection levels, and dental warranties.
If it affects the purchase decision, read the complete terms before fitting the product, because registration or timing conditions may apply.
Pre-purchase checklist
Before ordering, verify:
- [ ] The manufacturer states that the model is suitable for the player’s sport.
- [ ] Current team and competition rules have been checked.
- [ ] The correct model-specific size chart is available.
- [ ] Braces compatibility is explicit, if applicable.
- [ ] The fitting process is practical for your family.
- [ ] Remolding is expressly permitted, if that feature matters.
- [ ] Any strap or tether works with the helmet and applicable rules.
- [ ] Cleaning and storage instructions are clear.
- [ ] Replacement guidance is available.
- [ ] Warranty registration deadlines, limits, and exclusions are understood.
- [ ] The return policy covers an unfitted product.
- [ ] You know whether heating or molding ends return eligibility.
- [ ] A case and backup have been included in the budget where useful.
How a Hockey Gum Shield Should Fit
A model-independent fit check starts with retention. A commercial hockey fitting guide describes a suitable guard as remaining over the upper teeth without continuous clenching while allowing breathing and speech; it should also release when deliberately pushed away with the tongue. These are practical fitting criteria rather than a substitute for professional dental advice or the model’s instructions (Gunzo’s hockey mouthguard guide).
The guard should not painfully pinch the gums, press sharply against a tooth, or create a concentrated pressure point. Reassess it if it:
- drops when the mouth opens;
- shifts noticeably during speech;
- requires constant biting or chewing;
- repeatedly works loose;
- makes steady breathing unnecessarily difficult;
- causes pain, numbness, or pressure;
- prompts repeated removal during practice.
The solution may be another molding attempt if expressly permitted, a different size, or another design. Do not tell a child to clench harder for an entire game to compensate for poor retention.
A short fit test away from play
Test the guard before it is needed in practice or competition:
- Have the athlete insert it exactly as instructed.
- Ask them to open their mouth without deliberately holding it with the lower teeth.
- Have them speak several complete sentences.
- Ask them to breathe steadily for a short period.
- Check for movement, pinching, or concentrated pressure.
- Have them gently test deliberate release with the tongue.
The guard should release when intentionally removed, but it should not simply fall away during ordinary mouth opening or speech.
Check rear coverage against the model’s instructions. Do not cut, shorten, or reshape the back merely because it feels unfamiliar. Unapproved trimming may change the intended coverage or leave a rough edge.
Stop and reassess a newly fitted guard if it causes:
- persistent gagging;
- sharp or rough edges;
- numbness;
- painful pressure;
- difficulty with insertion or removal;
- a sensation that the bite has changed;
- pressure concentrated on one tooth.
Youth, junior, senior, adult, and one-size labels are not universal measurements. SISU, for example, uses height and braces status within its own youth sizing recommendations, including different guidance for players below and above five feet. Those rules apply only to the company’s products and should not be converted into general advice for other brands (SISU youth sizing guide).
Fit can also change without visible product damage. Lost baby teeth, erupting permanent teeth, jaw growth, and orthodontic movement may alter retention or create new pressure points. Repeat the fit test during the season rather than relying on appearance alone.
Choosing a Gum Shield for Braces and Changing Teeth
A player with fixed braces should use a guard explicitly designed or approved by its manufacturer for braces.
A braces-compatible design needs to accommodate brackets, wires, and expected tooth movement. The appropriate space and fitting process depend on both the appliance and the product. Ask the child’s orthodontist to review the proposed guard, especially when the player has:
- fixed upper and lower appliances;
- hooks, expanders, or other hardware;
- recent bracket or wire repairs;
- unusual tooth movement;
- sores or pressure near the appliance.
Braces-compatible options appear in several commercial hockey ranges. OPRO’s ice-hockey collection, for example, includes a braces filter and dedicated braces listings. That availability does not establish that every listed model suits every orthodontic arrangement (OPRO ice-hockey collection).
Some manufacturers recommend a larger size or allow repeated molding for braces wearers. SISU, for example, tells some braces wearers to size up within its own range and states that its guards may be remolded up to 20 times. Both are manufacturer-specific instructions and must not be generalized to other materials or brands (SISU youth and braces guidance).
Reassess the guard after:
- an orthodontic adjustment;
- eruption of a new tooth;
- pressure against brackets or wires;
- a change from secure to loose fit;
- cracking or deformation;
- difficulty inserting or removing it;
- a change to the orthodontic appliance.
Do not automatically apply ordinary boil-and-bite techniques around fixed braces. Standard fitting steps may include suction, biting, or finger pressure against the teeth, but a braces procedure can be different. Game On’s product-specific instructions, for example, tell braces wearers not to create suction or press the guard against the teeth during fitting, illustrating why generic molding instructions should not be substituted for a dedicated procedure (Game On braces fitting guidance).
Changing teeth require similar caution even when a child does not wear braces. A guard purchased during mixed dentition may stop fitting after a baby tooth is lost or a permanent tooth erupts. Reassess retention and comfort instead of waiting for visible damage.
Strapped, Strapless, Thin, and Tethered Designs
Strapped and strapless hockey guards are both commercially available. The practical distinction is attachment, not an established protection ranking.
A tether connects the mouthguard to a compatible caged helmet. Families may choose one as part of a loss-control routine, particularly for younger players, but the supplied evidence does not quantify whether tethered guards are lost less often or provide greater protection.
Check that the tether:
- attaches at the intended point on the cage;
- does not pull the guard forward or sideways;
- allows correct insertion and removal;
- does not interfere with fastening or removing the helmet;
- complies with the applicable equipment rules.
SISU, for example, markets a tethered model for caged-helmet sports and separately promotes thin or perforated designs for communication, breathing, or drinking. Those stated benefits are manufacturer claims, not independent proof that a particular profile is appropriate for every hockey environment (SISU product range).
Do not assume that the thinnest product is sufficient simply because the player prefers it. Conversely, bulk does not automatically establish greater protection. A bulky guard that causes gagging, constant chewing, or repeated removal creates a practical use problem, while a thin guard still needs suitable sport approval, coverage, retention, and condition.
Colors, flavors, and personalization may help distinguish the guard from a teammate’s or make it more acceptable to the child. They do not demonstrate protective performance.
Tethered versus untethered
Consideration Tethered Untethered Convenience Remains connected to a compatible helmet Can be used independently of the helmet Loss control Gives the guard a fixed storage location during play Requires a consistent case and storage routine Compatibility checks Cage, attachment point, fit, and rules Fit, storage routine, and rules Player preference Some players may dislike pull or movement No tether pull, but easier to set down separately Evidence gap No supplied comparative evidence establishes greater protection or quantifies loss prevention No supplied comparative evidence establishes greater protection There is no universal winner. Choose according to helmet compatibility, rules, the player’s loss history, and whether the design supports correct use.
What Hockey Gum Shields Cost—and What Price Does Not Prove
Use approximate price bands rather than treating the market as a cheapest-to-best ladder. The following examples are USD prices shown on the supplied commercial pages and checked on August 6, 2026:
- Basic youth or junior examples: around $6
- Many retail examples: approximately $10 to $31
Prices, currencies, tax, shipping, promotions, stock, personalization, and bundles can change. Verify the final currency and checkout total before ordering.
Total Hockey displayed selected junior, youth, senior, and adult products from $6 to $23 USD when checked on August 6, 2026 (Total Hockey gum-shield collection).
Longstreth’s field-hockey collection showed mouthguards from $1.99 to $30.99 USD on the same check date, although the collection also included accessories such as cases and cleaning products. A collection total should therefore not be interpreted as the number of distinct mouthguards available.
GuardLab listed a scanned PRO guard at $99.95 USD and an ARC Upper at $149.95 USD when checked on August 6, 2026. Those examples illustrate the higher listed cost of selected scanned products, not superior comparative protection.
Price may rise because of:
- an impression or 3D scan;
- professional fitting;
- personalization;
- braces-specific construction;
- multipack quantities;
- included cases or services;
- brand positioning.
None of those features establishes that protection increases in direct proportion to price. A more expensive option may still be worthwhile when it resolves a specific retention, comfort, or dental-fit problem.
Commercial prices can also conflict within the same page. One Goon Guard collection displayed strapped and strapless two-packs at $29.99 USD, while a cart widget showed $21.00 USD when checked on August 6, 2026. That discrepancy illustrates why the final checkout price matters more than a collection banner or search result (Goon Guard hockey collection).
Reserve part of the budget for a ventilated case, replacement after growth or damage, and possibly a backup. Do not use merchant ratings, sale percentages, warranties, endorsements, or named protection tiers to identify the safest or best-value product; the supplied commercial pages do not provide independent comparative testing that would support such a ranking.
Fitting, Cleaning, Storage, and Replacement
For a conventional boil-and-bite guard, the general process is:
- Read the complete model instructions before heating anything.
- Use the specified water temperature or heating method.
- Heat the guard for exactly the permitted time.
- Center the softened guard over the teeth.
- Shape it only as directed for that model.
- Cool it according to the instructions.
- Test retention, comfort, speech, and breathing.
This sequence is only an orientation. Materials, timing, heating methods, braces procedures, and remolding limits differ. The manufacturer’s model-specific directions control.
If the first molding fails, do not continue using a loose or painful guard simply because it was expensive. Remold it only when the manufacturer expressly permits another attempt. Otherwise, contact the seller or select a more suitable size or design.
Braces wearers should not use ordinary suction or pressure-fitting steps unless both the product’s braces instructions and the child’s orthodontist support them.
A simple care routine
After each use:
- Rinse the guard before and after wearing it.
- Gently brush or wash it using the permitted method.
- Rinse away cleaning residue.
- Let it dry completely.
- Store it in a ventilated hard case.
A commercial hockey care guide recommends rinsing, gentle brushing, thorough drying, and ventilated storage, and warns that hot cars and direct sunlight can deform mouthguard material (Better Hockey fitting and care guide).
Keep the guard away from:
- hot cars;
- radiators and heaters;
- direct sunlight;
- very hot water not authorized for cleaning;
- other high-heat locations;
- closed, damp equipment bags.
Do not assume that a cleaning method promoted for one material—such as dishwasher cleaning—is appropriate for another. Heat can change fit, so follow only the care instructions supplied with the model.
Replace by condition and fit, not the calendar alone
Replace or professionally reassess a guard when it develops:
- looseness or slipping;
- a changed bite sensation;
- pain or numbness;
- cracks;
- sharp or heavily worn edges;
- bite-through;
- visible deformation;
- persistent odor that normal cleaning does not resolve;
- incompatibility with newly erupted teeth;
- poor fit after growth;
- pressure after an orthodontic adjustment.
Some commercial guidance recommends replacement at least once per season. Treat that as an inspection reminder, not permission to continue using a damaged, painful, or poorly fitting guard until the season ends. Growing children and players in active orthodontic treatment may need reassessment sooner.
Pre-game inspection
Before the player leaves the changing room:
- check for cracks, bite-through, sharp edges, and deformation;
- confirm that the guard stays in without continuous clenching;
- ask about new pain or pressure;
- verify that the tether, if used, is correctly attached;
- make sure the ventilated case is labeled;
- carry a backup when travel, tournaments, or a history of loss makes that practical.
Frequently Asked Questions
Can a hockey gum shield prevent concussion?
A hockey gum shield should not be described as concussion-proof or as a replacement for a correctly fitted helmet, safe coaching, rule enforcement, removal from play after a suspected injury, or an appropriate concussion protocol.
The supplied evidence is not strong enough to make a product-specific or fit-category claim about concussion prevention. Commercial summaries discuss mixed findings, but they also draw on different sports and inconsistent comparison groups. Parents should therefore choose a mouthguard for its intended oral-protection role rather than relying on concussion marketing.
Are gum shields mandatory for ice hockey or field hockey?
There is no universal answer that applies to every form of hockey, age group, school, league, tournament, governing body, or jurisdiction.
Check the current official rulebook that governs the player’s competition and confirm the equipment list with the coach or team manager. Do not assume that ice-hockey and field-hockey requirements are the same, or that last season’s rules still apply.
Is a boil-and-bite guard good enough for youth hockey?
It can be a practical option when the manufacturer states that the model is suitable for the sport, the size is correct, the guard is molded according to its instructions, and it remains securely in place without continuous clenching.
It needs refitting or replacement when it slips, causes pain, makes reasonable breathing difficult, is repeatedly removed, or no longer fits after dental growth. A different retail design or a professionally fitted option may be worth considering after repeated molding failures, persistent intolerance of bulk, or dental issues requiring professional input.
Children with fixed braces need a braces-compatible product and orthodontic guidance rather than an ordinary guard tightly molded around brackets.
How often should a child’s hockey gum shield be replaced?
Use condition and fit as the main triggers. Replace or reassess the guard when it becomes loose, painful, cracked, bitten through, deformed, persistently malodorous, or incompatible with tooth eruption, jaw growth, or orthodontic changes.
A seasonal schedule can serve as a routine inspection reminder, but it should never delay earlier replacement. A growing child may need a new guard even when the existing one has no obvious visible damage.
Can the same gum shield be used for ice hockey and field hockey?
Possibly—but only when the manufacturer states that the particular model is suitable for both disciplines and it complies with each competition’s current rules.
Check the named sports, fitting instructions, helmet or tether compatibility, and applicable equipment requirements. If a model is listed only for field hockey or only for ice hockey, ask the manufacturer for clarification rather than assuming that “hockey” means universal approval.
Final Parent Checklist
Before the player takes the ice or field:
- Confirm the hockey discipline and current competition rules.
- Choose a model explicitly suitable for the player’s braces and equipment.
- Use the manufacturer’s own size chart.
- Test retention without continuous clenching.
- Follow the exact fitting, cleaning, and remolding instructions.
- Inspect fit and condition throughout the season.
- Keep the guard in a labeled, ventilated case and carry a backup when practical.
A reasonably priced hockey gum shield that fits securely, remains comfortable, and is consistently worn is a more defensible choice than one selected solely for protection labels, reviews, warranties, endorsements, or price.